Astrophotography Primer Part 1: Fundamentals
Astrophotography has become ever popular in the last decade or so as the equipment to do it well as plummeted in price. Now your average back yard astronomer with less than $3,500 or so in gear can take images that rival large imaging instruments from just a decade ago. You can even get some decent results with less expensive equipment and regular old camera lenses. Over the next few posts I'm going to go throw out there what I do to prepare, shoot, edit and finish my work. This is not the end-all-be-all guide to astrophotography, just a workflow that works for me.
Astrophotography seems easy on the outside but it is easily one of the most complicated, math intensive and taxing types of photography out there. It's not for the impatient. You can spend several hours over the course of one night shooting images and end up with squat on the other side due to poor planning or not understanding the subject. I'll go over some of the common pitfalls here too as I've made the same mistakes myself.
First off you'll need to know the basics of photography. Aperture, shutter speed, ISO, etc. If you don't know that like the back of your hand go figure it out and come back. I'm not trying to be rude, this blog post isn't going anywhere and you need to have a firm grounding. I also come from a math heavy background and will get into some numbers. Nothing most people can't handle but you should be warned.
Cue Jeopardy music ...
Back? Great! Now let's move on. The most basic type of astrophotography involves plunking your camera down on a tripod, grabbing a cable release and shooting some star trails. This is a great, simple way to get started.
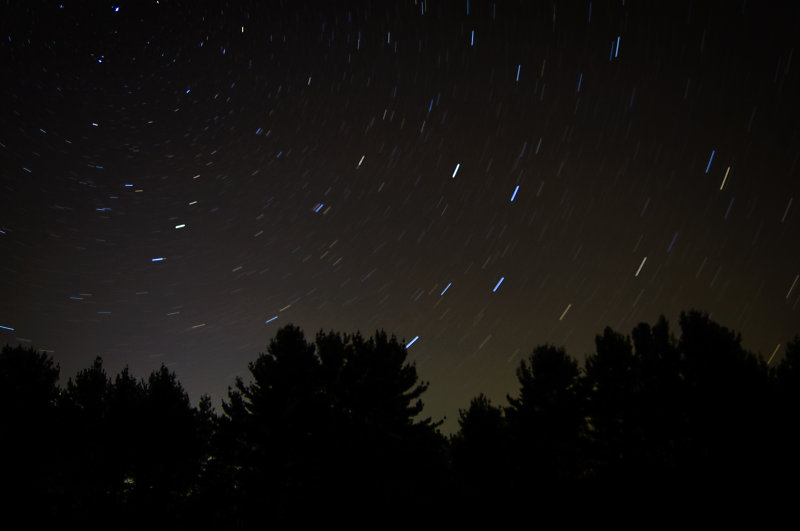
All you really need to do star trails is a sturdy tripod, a camera with a cable release, some kind of lens and a few hours of time. That's another thing. A short exposure for most deep sky objects is around 30 seconds. Most of my images have a few exposures ranging up to 10-15 minutes. Dress warmly and bring something with you to occupy the time. A red headlight or flashlight helps too. The longer you leave the shutter open the longer the trails. You'll need an area with fairly dark skies and no light domes on the horizon otherwise you'll over expose and the sky will be a putrid yellow color. A slow ISO (100-400) and small aperture will help too. You'll probably need to do a couple of test shots when you first get going to figure out what you can do at your location.
Another way to dodge the over exposure is to do what's called image stacking. This is where you take a bunch of shorter exposures, say 30 seconds to a minute, in the field and stack them in post to create the star trail effect. For this you'll want to cut off your camera's long exposure noise reduction feature and take dark frames manually.
Say what now? A dark frame? What are you talking about? Glad you asked. If you've ever dug around in your camera's menus you've probably seen a feature called something like "Long Exposure NR," at least that's what NIkon calls it. It should be on by default. What this does is called dark subtraction. If you take a photo with a shutter speed longer than a few seconds the camera will take a dark frame of the same length of time and subtract that from the light frame. Why is this needed? CMOS and CCD sensors generate a lot of noise during long exposures. Some of the older cameras (I'm looking at you my old D200) had some nasty amp glow around the edges of the sensor as well. "OK," you might say, "but how does subtraction help us here?" Digital images are nothing but numbers. As far as the camera and your computer is concerned a RAW file is an array of RGB luminance values or just plain luminance if you have a monochrome sensor Mr/Ms Leica user. In a light frame these numbers are the values that the were read out of the photosites when the shutter closed plus whatever noise was present in the sensor at that time. For shorter exposures in good light this noise is safely ignored. You've got some much signal in the light frame that it's inconsequential. For longer exposures of fainter things this noise becomes a problem and can at times be brighter than the image (light striking the sensor) itself. Temperature can affect this noise as well, generally colder sensors are less noisy.
Thus enters our hero, the dark frame. A dark frame is 100% pure noise. Kind of like your Facebook feed. I'm just kidding Facebook friends, really, or am I? You can take one manually by setting your shutter speed and ISO then leaving the lens cap on so no light strikes the sensor. Aperture doesn't matter. Then you're just left the noise that was present in your sensor at the time of capture. Generally if you're taking many multiple exposures you'll want to manually do your dark frames and subtract them later in post. However, I tend to leave the in camera dark subtract (Long Exposure NR) on for single shots or short series of photos. Depending on your equipment you may need to take bias frames and flat frames. With CMOS based cameras bias frames are not needed as they have a built in circuit that takes care of that for you. It's still needed for CCD based cameras. Bias frames are taken in much the same way dark frames are, that is with no light hitting the sensor. However, bias frames are taken with an exposure time of zero or as close as your camera will get. Again, these are generally not needed for modern cameras as most have CMOS sensors. Flat frames are used to compensate for dust on the lens or sensor. Generally flat frames are taken by aiming the camera at a uniform color frame. Anything uniform in color will work, such as a daylight sky, as long as it's properly exposed and not blown out. For most wide filed astrophotography I don't do flats. Dust doesn't seem to really bother the image much. Plus it's pretty easy to keep lens elements clean. If you're using something like a Catadioptric Telescope (SCT or Mak) they are useful as the imaging surfaces are harder to get to. I consider any lens or telescope under 600mm to be a wide field.
Generally if I'm doing star trails, which I don't do very often, I'll do a bunch of 45-60 second exposures, a few dark frames at the end of the night then do the subtraction and stacking in post. However, there's nothing wrong with just doing a 30 minute exposure to test the waters. You just introduce a higher likely hood that something will go wrong and you'll lose the work.
In the next post I'll detail some of the gear I use in the field and some concepts for shooting.